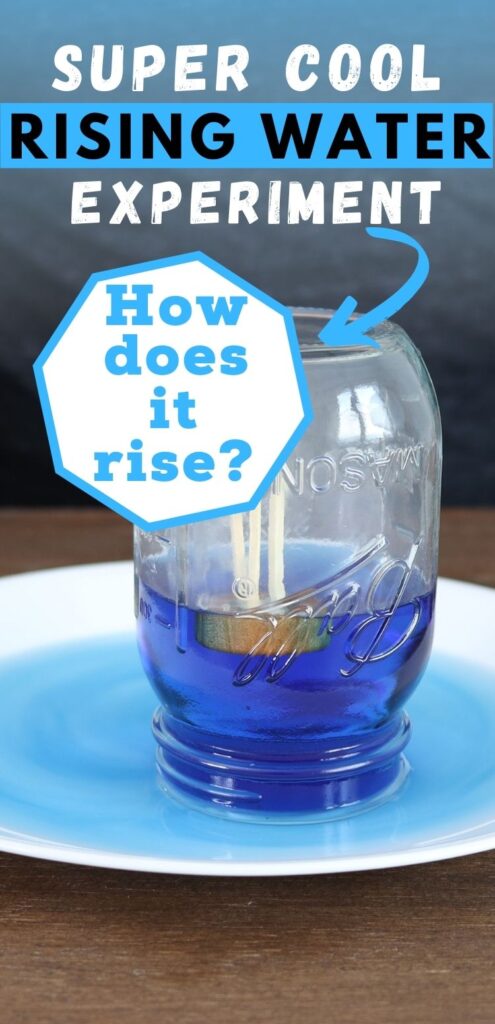
This is a super fun and exciting way to learn about the properties of air pressure by watching water get pulled into an upside-down jar! This science experiment only requires a few household items along with adult supervision. Here is how to do the Rising Water Experiment Step by Step.
Get more fun and easy Atmospheric Pressure Experiments here!
PIN THIS EXPERIMENT FOR LATER
The best thing about this gravity defying science experiment is that it takes less than 10 minutes to gather up your supplies to start learning while having fun!
Rising Water Experiment Step by Step
This post may contain affiliate links. As an Amazon Associate, I earn from qualifying purchases.
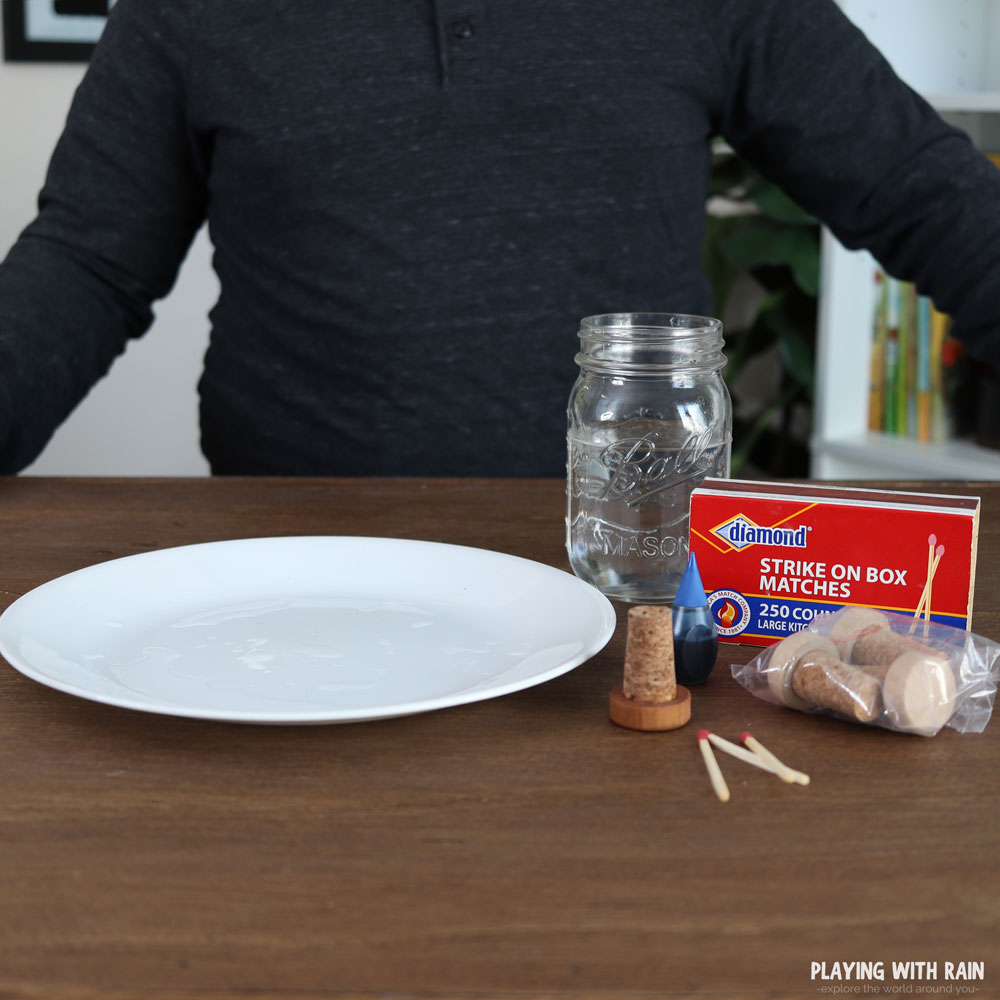
Supplies Needed:
- Clear glass jar or cup
- Plate
- Water
- Box of matches
- 1 Bottle cork (or a candle)
- Food coloring (optional)
How to Make Water Rise in a Jar
- Cut the cork in half lengthwise and poke 3 holes in it for the matches to fit. (Skip this step if you are using a candle)
- Fill the plate with water and place the cork (or candle) in the middle
- Place your match platform or candle on the plate and ignite them
- Place the jar or glass upside down over the flame and let it rest on the plate
- Watch as the flame goes out and the water rises in the glass!
Step 1: Get the cork or candle ready
Depending on the materials you have available for this, you can use a bottle stopper cork, a candle, or even a small block of wood. The idea is that you need a safe platform for your flame to sit on in the water.
I didn’t have any candles at home, so I opted to use a cork bottle stopper that had a round wood piece at the end. You can pull the round wood piece off pretty easily and even use the wood piece for your match platform.
Using the round wood piece I then used a power drill on a small drill bit (about 3/32″) to drill 3 small holes in the cap. These holes should be a snug fit to hold your match sticks upright when the round wood cap floats in the water.
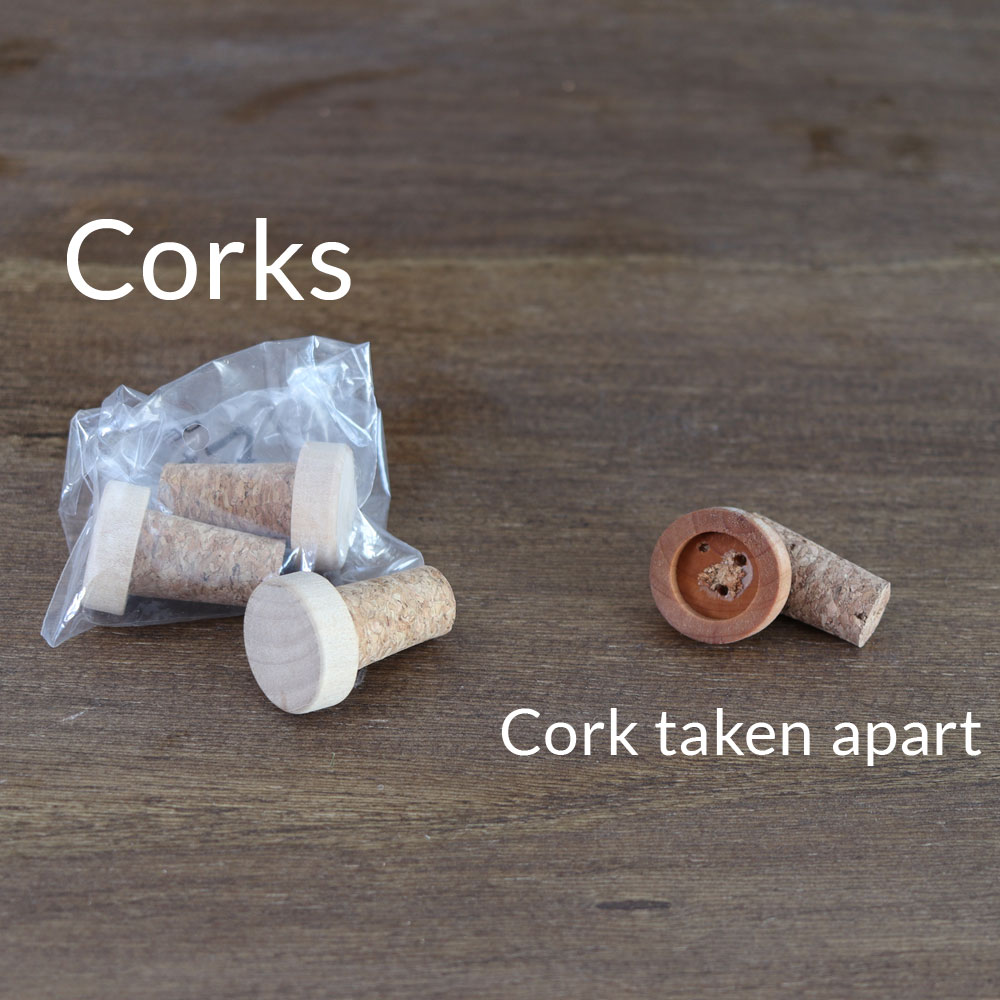
Another way to create this platform for the matches is to cut the cork in half lengthwise from top to bottom. Then use a pen to poke 3 holes for the matches into the soft cork.
The easiest way would be to just stick a candle onto the middle of the plate and then fill the plate with water. Since I didn’t have a candle and tend to do things the hard way, I went with using the round piece of wood from the cork.
You could also use a little block of scrap wood and drill holes into it. The important part is that it floats and will keep your matches out of the water.
Step 2: Fill your plate with water (and add some color if you want to)
I am a little bit obsessed with using food coloring and anytime I get the chance to add a little color to the water in these experiments I go for it! So if you want to add your favorite color to the water now is your chance!
The easiest way to do this is to fill your jar about halfway full of water. When you add the food coloring you can give the jar a little twist. Then pour the water onto your plate and the coloring should be mixed in.
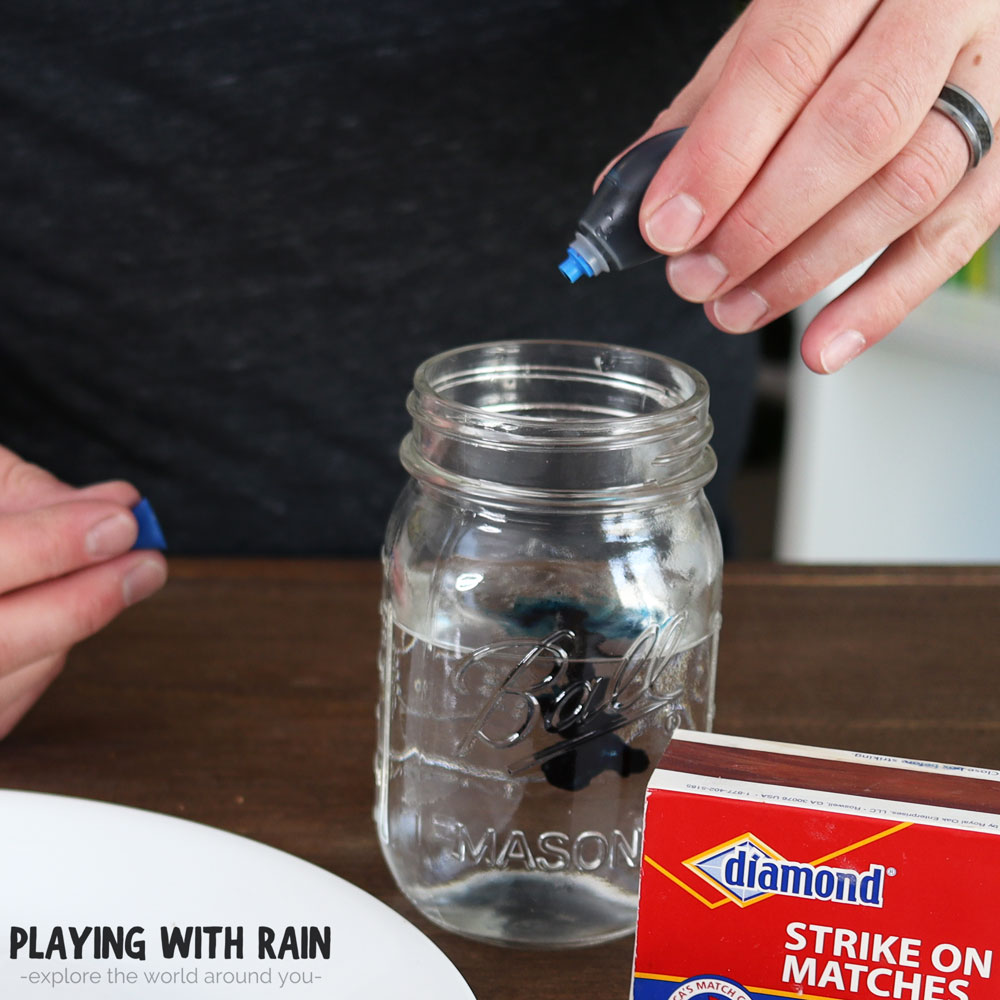
Adding food coloring to your water will help the water be more visible when it gets sucked into the jar, but this experiment will also work completely fine with plain old clear water too!
Step 3: Place your match platform or candle in the water on the plate and light them
Now the fun is really starting to heat up, but before we go any further remember that adult supervision is required from here on out since we are working with fire!
Go ahead and grab and candle and stick it in the middle of the water-filled plate. If you are using a makeshift match platform like me, push three matchsticks into the holes in your platform and place it in the water.
Note: If you are using a cork that was cut in half, you will need to carefully balance the placement of your matches to prevent them from tipping into the water and being extinguished.
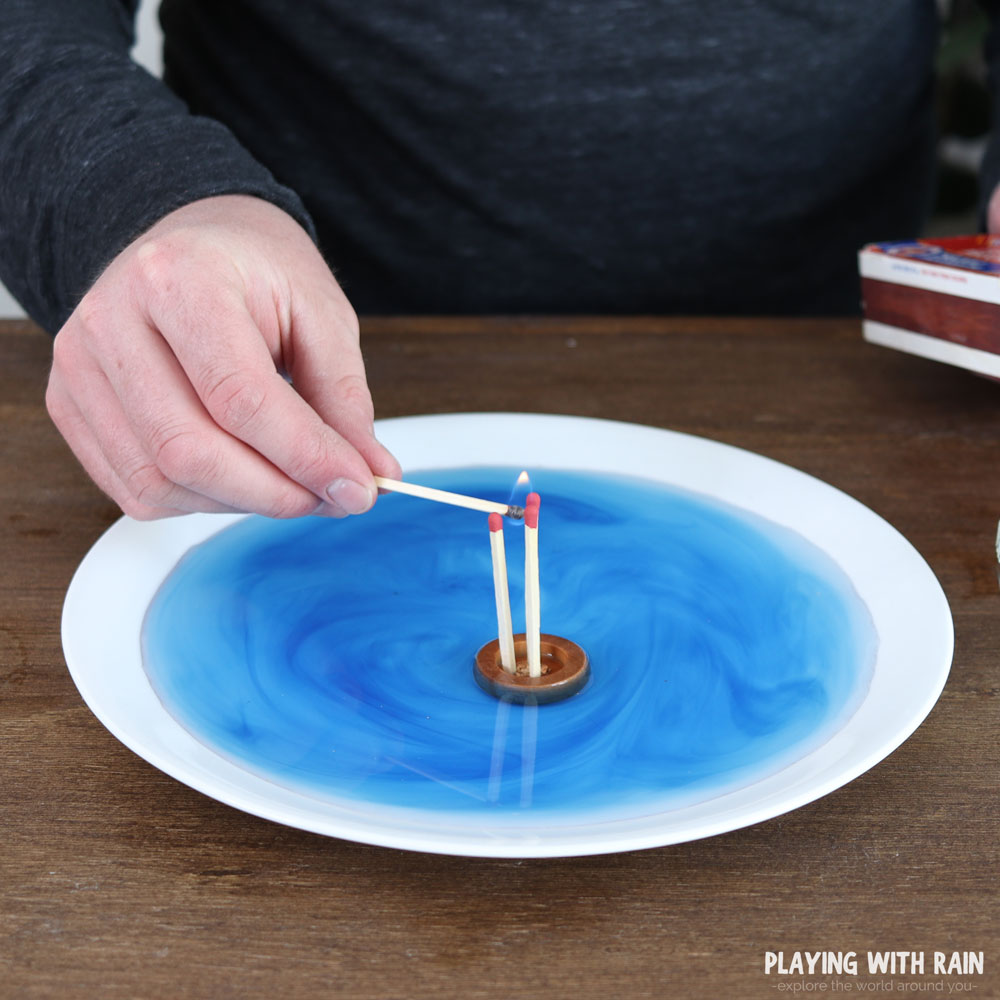
Use another match or a lighter to light your fire device of your choosing. If you are using matches for your “floating flame” you need to hurry on to the next step before they burn out. If you are using a candle then you can take your time moving onto the next step.
Step 4: Tip your empty jar upside down over the flame on the plate
Now it’s time to witness some crazy cool science in action! Grab your jar or clear glass and gently, but quickly turn it upside down and set it on top of the burning flame.
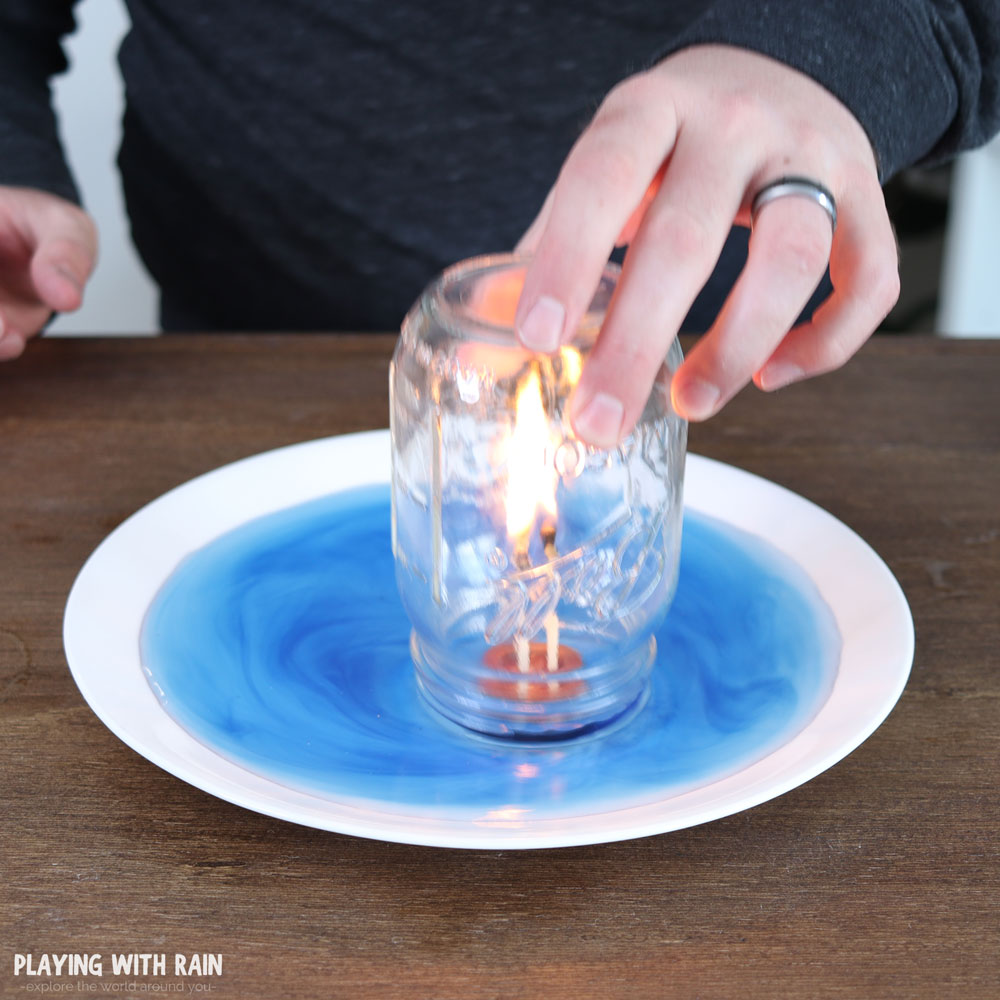
Go ahead and move your hand from the jar (the jar might get a little hot) and let it rest on the water-filled plate. This is the part you don’t want to miss!
Step 5: Watch the flame go out as the water rises in the jar
You should see the water slowly rise in the jar as the flame is still burning, but after a second or two the flame will go out and the water will rapidly rise into the jar.
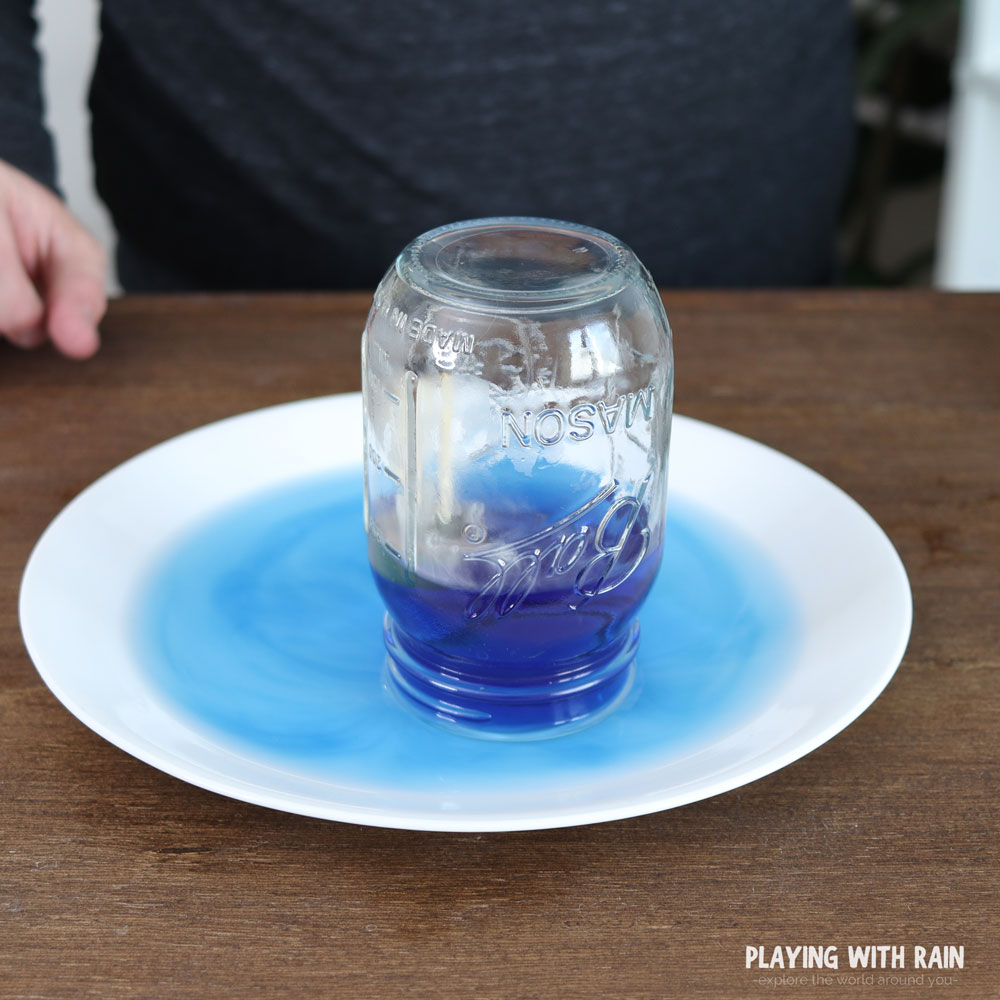
After another second or two the water will stop rising but will stay at that level until the jar is pulled from the plate.

Why does the flame go out when you put a jar over it?
When a jar or glass is placed over the flame, the flame can only burn for a few seconds before running out of oxygen. Fire needs oxygen to burn and once all the oxygen inside the jar is burned up, the fire will go out.
How does the water rise inside the jar?
As the fire in the jar rapidly heats up the air inside the jar, the air molecules start moving faster increasing the air pressure. Some air escapes between the jar and the plate as the pressure pushes it out.
As soon as the flame runs out of oxygen and is extinguished in the jar, the very hot air rapidly cools and contracts and the pressure drops quickly. This lower pressure inside the jar is imbalanced between the relatively higher pressure on the outside of the jar.
Does air pressure make the water rise in the jar?
Yes, the lower pressure inside the jar in partnership with the higher pressure pushing down on the plate of water causes the water to fill the empty space in the jar. The water will rise until the pressure on the inside of the jar and the outside become equal.
Try mixing it up:
An interesting variable to try with this experiment is to use cold water and then do it again using hot water. Did you notice any difference?
What happens if hot water is used in the rising water experiment?
The rising water in the jar experiment should work with either hot or cold water, but I did notice the hot water does not get quite as high in the jar.
This is because the warmer water keeps the air in the jar from cooling down as fast as it can with the cold water once the flame goes out. Since the air doesn’t cool as fast with the hot water in the jar, the pressure doesn’t drop as low and the water doesn’t get pulled as strongly into the jar.
Can water rise out of the ocean into a hurricane?
Yes, this experiment is a great way to explain how storms work and especially how hurricanes can gain enough strength to actually pull water from the ocean up into the center of the storm.
This is possible thanks the sun providing uneven heating of the air on the earth. As warm air is heated by the sun it rises and becomes less dense. The cooler, high-density air begins to move to take the place of the warm air.
This cycle continues to repeat and is part of the process of creating high and low-pressure weather systems. The stronger the pressure difference (pressure gradient) is between a low-pressure system and a high-pressure system, the faster the wind speeds will generally be!
If the pressure drops low enough and the wind is strong enough (like in a hurricane) then the water can actually be lifted up and out of the ocean just like it was lifted into the jar in our experiment!
PIN THIS EXPERIMENT FOR LATER
Leave a Reply