You may have already made a cloud in a bottle in some way, shape, or form, but did you know there are several different methods to do this!? Here are 3 easy ways to make a cloud in a bottle that will have you and your kids amazed!
Get more fun and simple Weather Experiments for Kids here!
PIN THIS EXPERIMENT FOR LATER
My favorite thing about this experiment is that you can choose any 3 methods to make the cloud, but the science behind how it happens is all the same!
And once you have gathered the few materials needed for this experiment, you can repeat the process over and over again for everyone to enjoy!
First Method: Make a Cloud in a Bottle with Matches
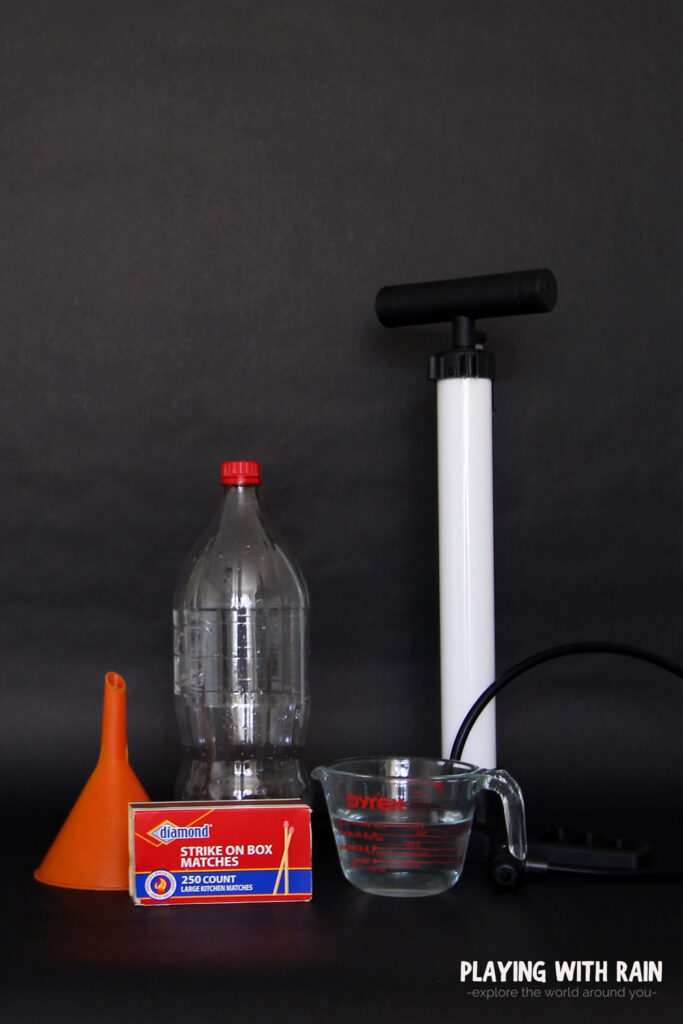
Supplies used:
- 2 liter clear plastic bottle
- Bike floor pump
- Tire valve system
- Box of matches
- Warm water
- Funnel (optional)
Steps:
- Take the label off the bottle so that the bottle is clear and transparent.
- Attach a tire valve stem to the end of your bike pump attachment.
- Use a funnel to pour a little warm water into the bottle.
- Light a match and drop it into the bottle. (This is the Cloud Condensation Nuclei)
- Fit the tire valve stem snugly into the opening in the bottle.
- Use the pump to increase the pressure in the bottle.
- Release the valve stem quickly to allow the pressure to escape.
- Watch and enjoy as a cloud forms inside the bottle.
Second Method: Make a Cloud in a Bottle With Hairspray
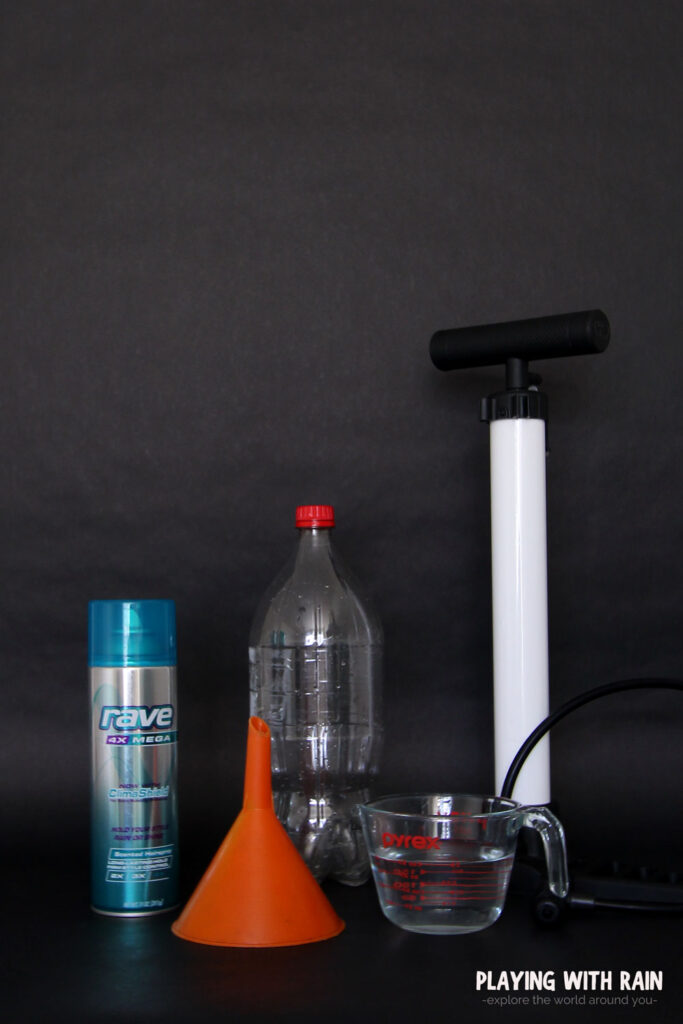
Supplies used:
- 2 liter plastic bottle
- Bike floor pump
- Tire valve stem
- Warm water
- Can of Aerosol Hairspray
- Funnel (optional)
Steps:
- Take the label off the bottle so that the bottle is clear and transparent.
- Attach a tire valve stem to the end of your bike pump attachment.
- Use a funnel to pour a little warm water into the bottle.
- Spray a little bit of aerosol hairspray into the bottle. (This is the Cloud Condensation Nuclei)
- Fit the tire valve stem snugly into the opening in the bottle.
- Use the pump to increase the pressure in the bottle.
- Release the valve stem quickly to allow the pressure to escape.
- Watch and enjoy as a cloud forms inside the bottle.
Third Method: Make a Cloud in a Bottle With Rubbing Alcohol
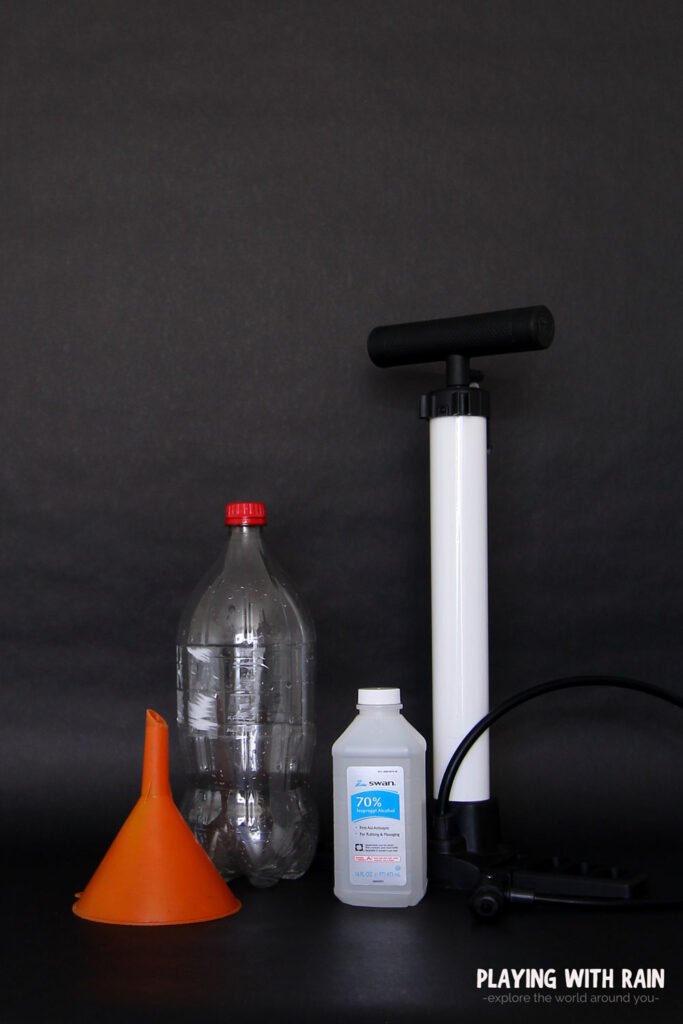
Supplies used:
- 2 liter plastic bottle
- Bike floor pump
- Tire valve stem
- Rubbing Alcohol
- Funnel (optional)
Steps:
- Take the label off the bottle so that the bottle is clear and transparent.
- Attach a tire valve stem to the end of your bike pump attachment.
- (This is where we added the water for method 1 and 2, but we don’t need water this time, so skip the water here).
- Pour a little bit of rubbing alcohol into the bottle (This is the Cloud Condensation Nuclei).
- Fit the tire valve stem snugly into the opening in the bottle.
- Use the pump to increase the pressure in the bottle.
- Release the valve stem quickly to allow the pressure to escape.
- Watch and enjoy as a cloud forms inside the bottle.
Step 1: Remove the label from the bottle
After drinking your favorite soda from a 2 liter bottle, simply save the bottle and wash it out with soap and water. Then you will want to run the outside of the bottle under warm soapy water as you pull the label off.
If a sticky residue remains on the bottle, you can use a paper towel and a little rubbing alcohol to get the glue off the bottle.
This will get your bottle nice and clear so that you can easily see the cloud as it forms inside the bottle.
Once you complete this step for the first cloud in a bottle method, you will be able to skip this step for the second and third methods.
Step 2: Attach the tire valve stem
You can find a tire valve stem at most auto parts stores or on Amazon for around $3 or $4.
Attach the the tire valve stem to the end of the Schrader valve on your floor pump. Most floor pumps will have a little lever you will pull down to lock the valve into place on your pump.
Step 3: Add the warm water
(For method 3, skip this step.)
You don’t need boiling hot water for this, and you certainly do not want to burn yourself or you kids either. You just need a little nice, warm water to help speed up the evaporation in the bottle.
To prevent spills I like to use a little funnel when pouring the water into the bottle. You only need enough water to cover about an inch deep in the bottom of the bottle.
You might want to put the cap back on the bottle, or cover the top with your hand and swoosh the water around a little bit. This will coat the sides with water and allow the water to evaporate quicker.
Again, you need to skip this step if you are doing the third method using rubbing alcohol. The rubbing alcohol already has 30% water in it, and to make the most effective cloud, we only want to add the 70% isopropyl alcohol for method three.
Step 4: Add the Cloud Condensation Nuclei
Adult supervision is required when using matches for this step during method 1. If you are doing all three of these methods, you will want to do method 1 first since you do not want to light a match after using flammable materials that will be used in method 2 and 3.
The reason to use the method requiring matches first is because you will be using aerosol hairspray and rubbing alcohol in the next two methods (AKA flammable materials that can explode if ignited).
For Method 1 with Matches: Make sure your cap is off the bottle and then go ahead and grab a match out of your box and light the match.
Let the match stick catch fire for a second or two and then drop it into the bottle. The match will of course go out once it reaches the water at the bottom of the bottle.
When the match goes out, the smoke that is created will become the Cloud Condensation Nuclei that will help to create your cloud. I know, I know that is a big scientific term, but we will explain this after making your cloud!
Method 2: Instead of lightning a match and putting in the bottle, just pray a little aerosol hairspray in the bottle instead.
Method 3: Add Rubbing Alcohol to the bottle instead of matches or hairspray.
Step 5: Fit the valve stem onto the bottle
After you have added the cloud condensation nuclei (match to create smoke, hairspray, or rubbing alcohol) into the bottle you will want to quickly place the valve stem into the top of the bottle. This will help to trap the particles in the bottle, which is needed for your cloud to form.
The valve stem should fit very snug into the opening of the bottle to create a good seal. You might need to twist a little bit and muscle it in to the opening a little to make sure that air will not leak out.
The tighter the valve stem is in the bottle opening, the better the seal will be and that will create the best cloud possible!
Step 6: Pump up the pressure
Use your floor pump to begin increasing the pressure inside of your bottle. This is easier if you have a second person help pump while the other person holds onto the bottle.
It is also a good idea to keep a good grip on the valve stem at the top of your bottle. As the pressure increases, the valve stem can pop out of the bottle, but if you have a good, snug fit, and hold it in with your hand it should stay.
You only need to pump up the bottle with a little bit of pressure. Two or three times going up and down with the pump should be enough pressure. You can feel the pressure building in the bottle with your hands.
(Optional): You can also use an air compressor for this, but be very careful not to over inflate the bottle and cause it to explode. Because of this danger I prefer to stick to the floor pump with lower pressure.
Step 7: Release the valve stem quickly
Once the bottle feels nice and firm and there is enough pressure built up inside the bottle, release the valve stem from the top and let the air escape. The faster the air escapes, the more dramatic your cloud will be.
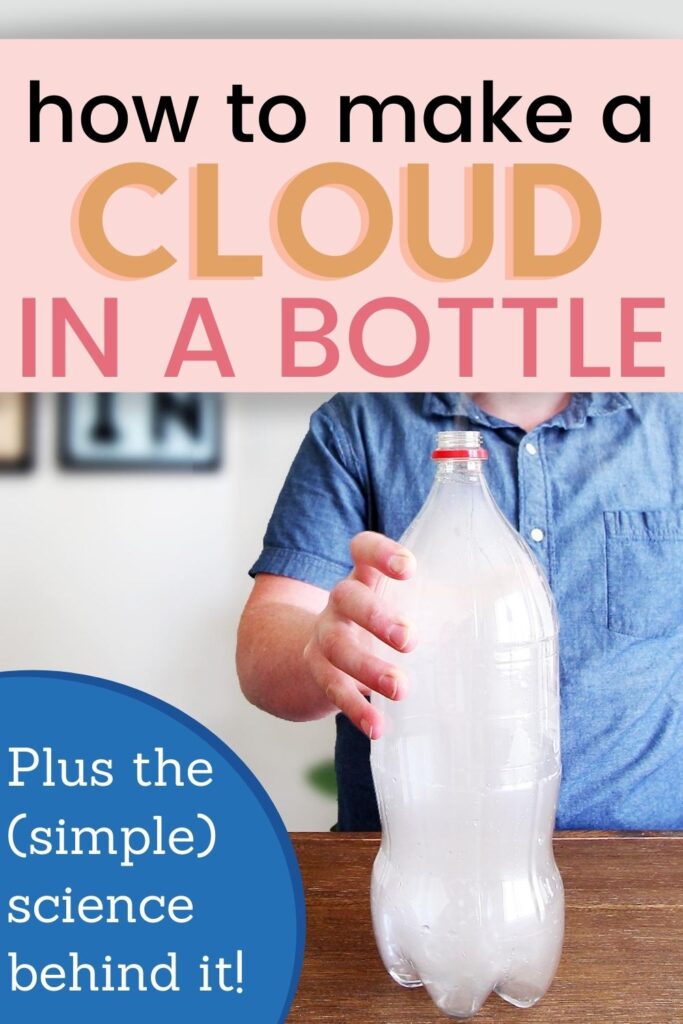
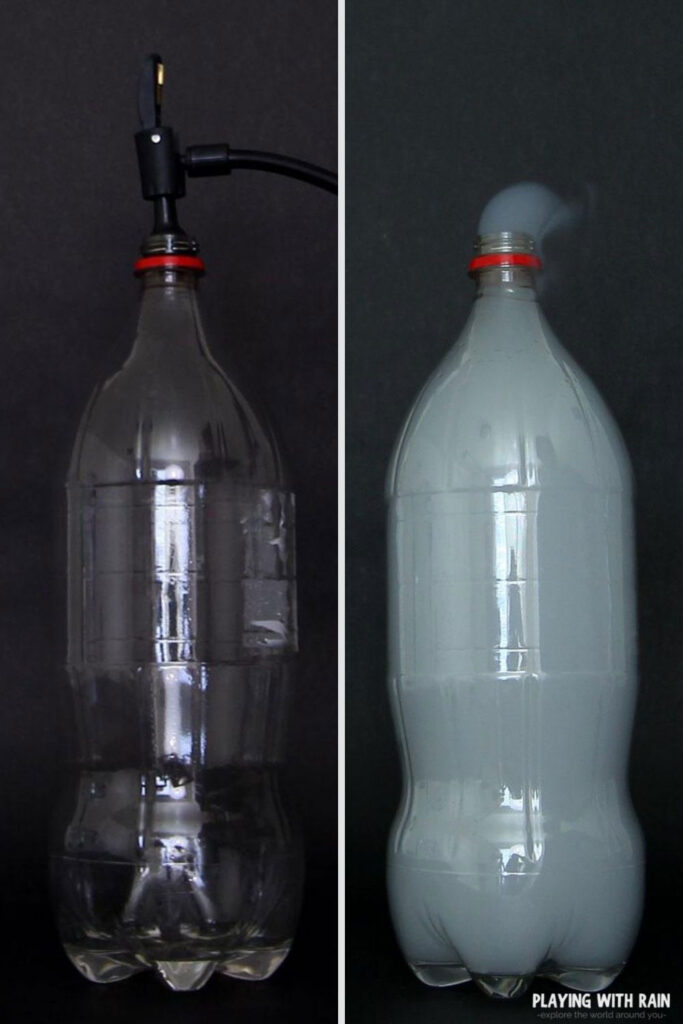
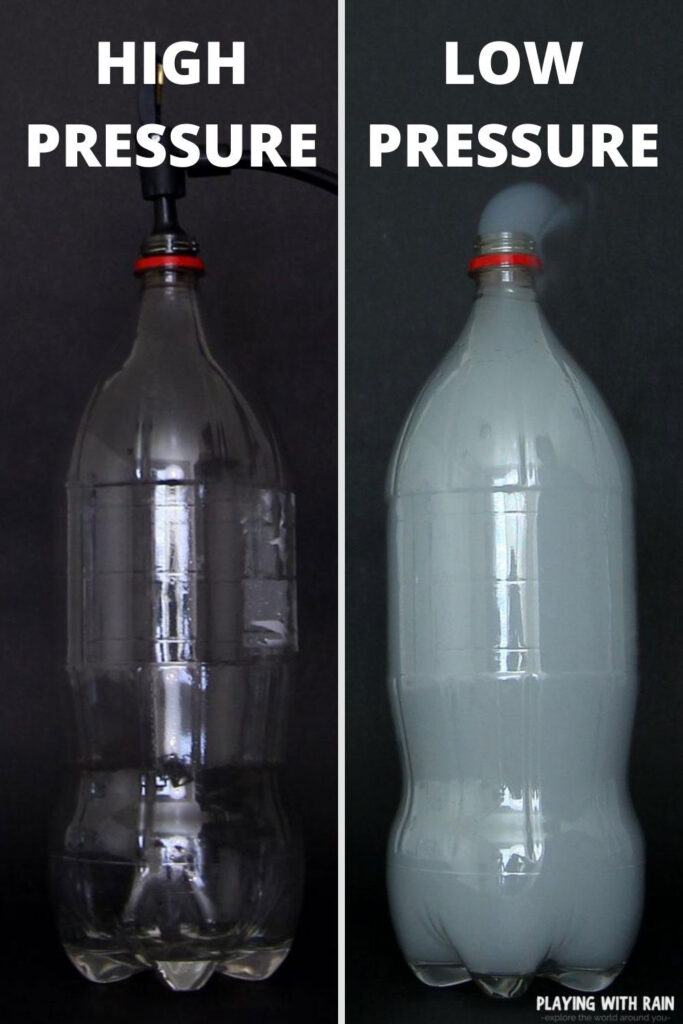
Step 8: Watch your cloud form in the bottle
What happened!!!?
Which of the 3 different methods created the best, most visible cloud!?
You should be able to see a cloud form whether you used matches, hairspray, or rubbing alcohol for this experiment, but the third method that uses rubbing alcohol typically creates the best, thickest cloud!
And the awesome thing about this experiment is that you can keep doing it again and again. In fact, my favorite is using method 3 with the rubbing alcohol and repeating steps 6 and 7.
As you increase the air pressure in step 6 the cloud will vanish just as quickly as it formed (which is just as cool in my opinion), then as you release the pressure in step 7 the cloud magically appears again!
Now lets dive into the science behind how this happens and what this cloud in a bottle teaches us about how high and low pressure influence our weather everyday!
The Science Behind the Cloud in a Bottle:
The high pressure in the bottle kept the evaporated water vapor from condensing, but once the air escaped and the pressure dropped the water vapor was able to condense onto the smoke particles, hairspray droplets, and rubbing alcohol to create the cloud.
What is Cloud Condensation Nuclei!?
Now comes that big scientific term Cloud Condensation Nuclei that makes all of the cloud magic happen in the bottle.
Although the term seems big and confusing, it simply refers to the fact that water vapor needs something that is not a gas to latch onto and create a liquid water droplet.
What Are Some Examples of Cloud Condensation Nuclei?
In the atmosphere, Cloud Condensation Nuclei are found in the form of tiny salt, smoke, dust, and other aerosol particles that are suspended in the air.
In this case the tiny smoke particles in method 1, the hairspray particles in method 2, and the rubbing alcohol particles in method 3 all acted as the Cloud Condensation Nuclei, or CCN to allow the water droplets to form.
How does air pressure influence cloud development?
Just like our experiment in the bottle, when the air pressure is high, the bottle remains clear, but when the pressure drops in the bottle, the water vapor condenses onto the tiny particles and creates a cloud.
The same thing happens in the Earth’s atmosphere.
When the air pressure drops, the air rises and cools rapidly, which allows the water vapor to cool and condense into tiny water droplets that create clouds.
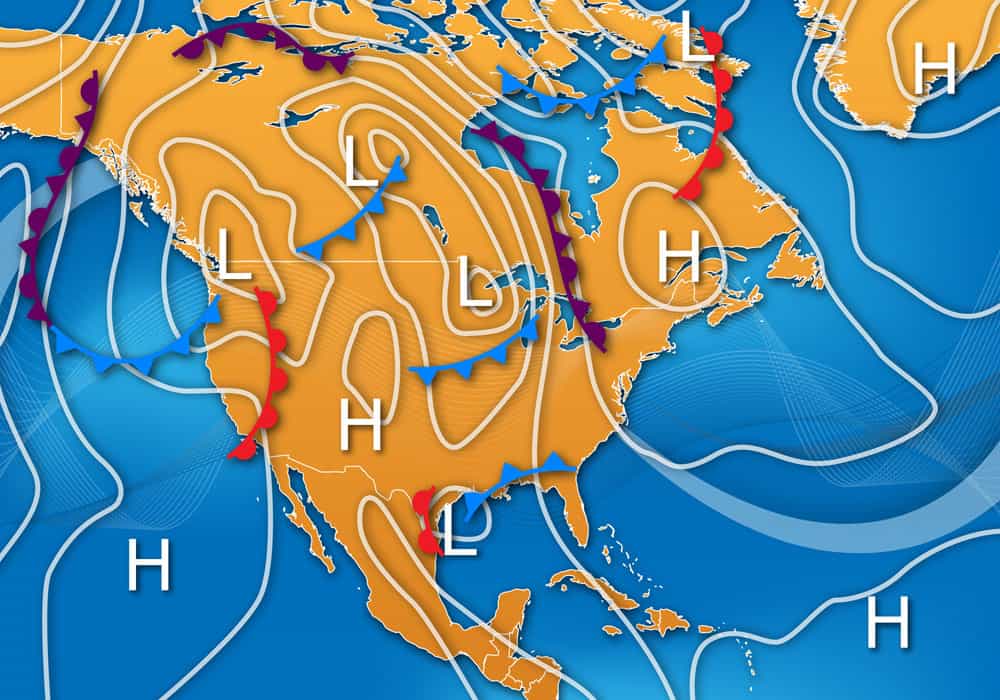
What type of weather is associated with high pressure?
High pressure weather systems typically bring sunny, clear conditions because the air pressure above is sinking and not allowing the air to rise and cool to create clouds.

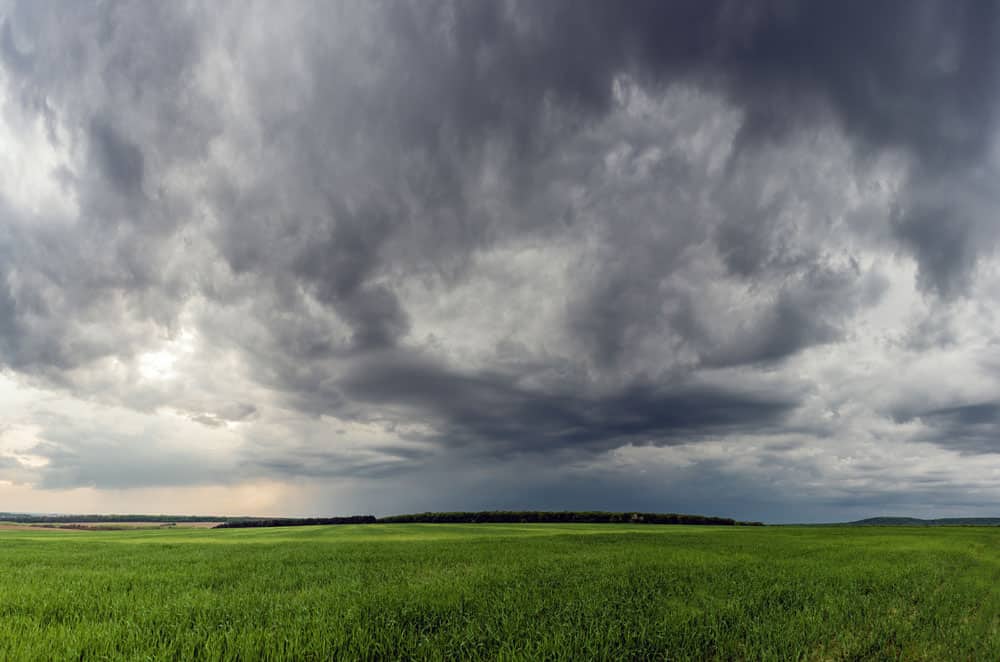
What type of weather is associated with low pressure?
Low pressure weather systems allow warmer air on the ground to rise and cool and eventually form clouds.
Depending on how much moisture those clouds can hold is what determines if it will actually rain on you, or if it will just be a cloudy, overcast day.
This is why you can usually blame low pressure systems on lousy, stormy weather and thank high pressure systems for happy, sunny weather.
High and low pressure symbols:
An easy way to remember the type of weather that high and low pressure brings is that the big blue “H” on the weather map stands for “Happy High Pressure, and the big red “L” stands for “Lousy Low Pressure.”
PIN THIS EXPERIMENT FOR LATER

Leave a Reply